
Injection molding is a well-known manufacturing method, and for good reason. Many companies and consumers see the value of this fast-moving industry: it has proven itself as a way to bring new products to market. Plastic is the main component of a huge number of products, and injection molding is one of the best ways to shape it. Let's walk through the process step by step.
Step 1: design your product
Design is one of the most important parts of the production process, because it is the earliest opportunity to prevent costly mistakes (making sure the product idea itself is good is of course equally important). A design has to balance a lot at once: manufacturability, assembly, function and appearance. Getting there takes both discipline and creativity.
Two concrete ways to avoid expensive mistakes: keep the wall thickness as uniform as possible, and use a gradual transition where a change in thickness cannot be avoided. It also helps to avoid sharp internal corners of 90 degrees or less, since they concentrate stress and complicate filling.
A team of skilled design engineers can brainstorm, design and refine a range of solutions that match the complexity of your project. Looking for a strong design partner? Take a look at the [product design agency](https://studiomango.nl/) Studio Mango.
Step 2: create your mold
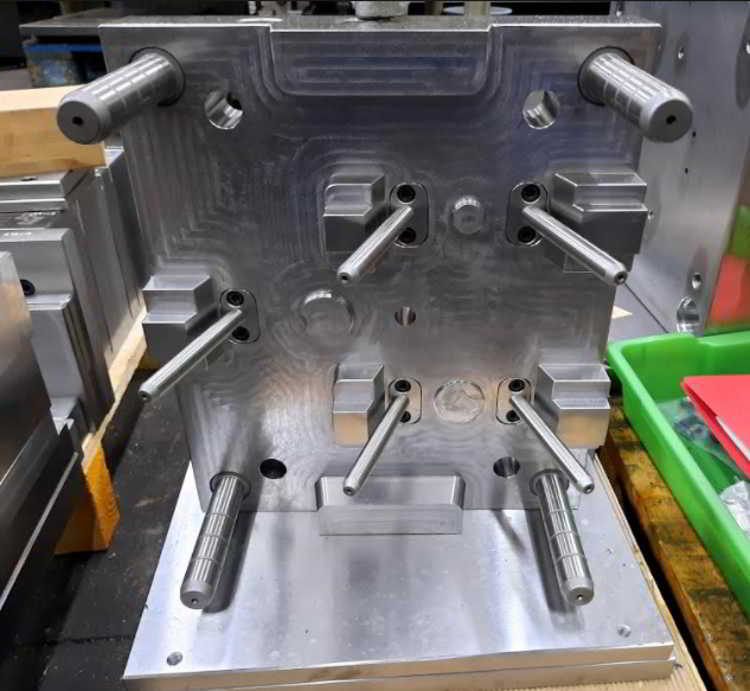
Once the design has been tested and approved, the mold has to be designed and made. Molds are usually made from one of the following metals:
- Hardened steel is normally the most expensive option, but it also lasts the longest in terms of number of shots. That makes it a good choice when you need hundreds of thousands of parts, because the tool cost is spread over a large volume.
- Pre-hardened steel is not as hard as through-hardened steel and is cheaper to make, which makes it a middle ground between prototype and full production tooling.
- Aluminium is the most common choice for a single-cavity prototype tool, when a relatively low number of parts is needed for testing. Thousands of parts can come out of an aluminium tool, but it is generally used for low volumes. Once the injection molded parts have been tested and approved, a multi-cavity steel production tool is made.
- Beryllium copper alloy is used in areas of the mold that need rapid heat removal, or where shear heat concentrates.
Step 3: manufacture your product
Once your product has been properly designed and the mold has been made and approved, actual production can start. The thermoplastic or thermoset material is supplied as granules, which are fed from the hopper into the heated barrel.
There the plastic is heated to a set temperature, and a large screw pushes it through the gate or gates into the mold. With the mold closed, the screw holds pressure for a set cooling time. Then the screw retracts, the mold opens and the part is ejected. That cycle repeats over and over, which is what makes it possible to produce hundreds of parts in a short time.
The injection molding process at Production Heroes
As a manufacturing company, our priority is high-end, sustainable products. [Injection molding](/process) is one of the production methods most used by consumers and companies to make plastic products. Production Heroes works with the best manufacturing partners around the world, and you can see some of our injection molded products in our [project cases](/projects), including [Higo Sense](/projects/higo-sense).
Looking for a capable [product manufacturer](/process)? Get in touch. We guide you all the way through, with transparent and frequent communication. And we do more than manufacture: we have two dozen professionals on our floor with over twenty years of experience in design, engineering and manufacturing, who can help take your innovation to the next level.
Frequently asked questions
- Which mold material should I choose for my volume?
- Aluminium for a single-cavity prototype tool and low volumes; pre-hardened steel as the middle ground; hardened steel when you need hundreds of thousands of parts, because the tool cost is then spread over a large volume.
- Do I need a steel production tool straight away?
- Usually not. The common route is an aluminium prototype tool for testing, and only after the parts are tested and approved is a multi-cavity steel production tool made.
- Which design mistakes are the most expensive to fix later?
- Uneven wall thickness and sharp internal corners of 90 degrees or less. Keep walls uniform, make transitions gradual, and round internal corners — all three are free at design stage and costly afterwards.
- Why do some molds need beryllium copper?
- It is used in areas of the mold that need rapid heat removal, or where shear heat concentrates. Local cooling problems are solved with the insert rather than by slowing down the whole cycle.